Difference between revisions of "Opencv for PD"
(→DOWNLOAD & INSTALL) |
(→Install from sources) |
||
| (23 intermediate revisions by the same user not shown) | |||
| Line 85: | Line 85: | ||
===== pdp_opencv_bgstats / pix_opencv_bgstats ===== | ===== pdp_opencv_bgstats / pix_opencv_bgstats ===== | ||
| + | |||
| + | ( replaced in 3.x by pdp_opencv_bgsegm ) | ||
This object is very similar to bgsubstract but it uses a time parameter and a statistical model that makes objects considered as the foreground disappear after a while and then | This object is very similar to bgsubstract but it uses a time parameter and a statistical model that makes objects considered as the foreground disappear after a while and then | ||
| Line 596: | Line 598: | ||
| − | ===== | + | ===== pdp_opencv_match_shape / pix_opencv_match_shape ===== |
| + | |||
| + | This object takes two inputs, generally an incoming video stream and pattern images, also in form of a video stream and tries to detect the patterns in the incoming video frames. | ||
| + | |||
| + | It operates as follows : it extracts from the pattern images the biggest contour and compare the contours of the incoming video using cvMatchShapes, which compares contours calculating their Hu moments, characteristics of the topology of the contours. | ||
| + | |||
| + | Synopsis : | ||
| + | |||
| + | pdp_opencv <nbpatterns> <pattern_width> <pattern_height> | ||
| + | |||
| + | nbpatterns : number of patterns. | ||
| − | + | pattern_width : width of the patterns ( they must all be of the same size ). | |
| − | . | ||
| − | + | pattern_height : height of the patterns. | |
| − | |||
| − | + | Parameters Settings : | |
| + | |||
| + | index : set index where the next pattern received will be stored. | ||
minsize : minimal size of threated contours, to remove small shapes and noise. | minsize : minimal size of threated contours, to remove small shapes and noise. | ||
method : method used in cvMatchShapes which can be one of : | method : method used in cvMatchShapes which can be one of : | ||
| − | CV_CONTOURS_MATCH_I1, CV_CONTOURS_MATCH_I2 or CV_CONTOURS_MATCH_I3 : the difference between the Hu moments are computed with different formulas ( see cvMatchShapes | + | CV_CONTOURS_MATCH_I1, CV_CONTOURS_MATCH_I2 or CV_CONTOURS_MATCH_I3 : the difference between the Hu moments are computed with different formulas ( see cvMatchShapes documentation ). |
| − | |||
clear : recalculate the contour of the pattern image if ever it changes. | clear : recalculate the contour of the pattern image if ever it changes. | ||
| Line 622: | Line 633: | ||
second outlet : the pattern image contour. | second outlet : the pattern image contour. | ||
| − | third outlet : the | + | third outlet : the index of the closest pattern to the incoming stream and its distance to it. |
| − | fourth outlet : the coordinates of detected matching contours. | + | fourth outlet : the index, coordinates and sizes of detected matching contours. |
[[Image:Hu-compare.png]] | [[Image:Hu-compare.png]] | ||
| − | note : as the contours are all normalized before the comparisons, the size and orientation of the contours should not impair the detection, but from the tests we've been running | + | note : as the contours are all normalized before the comparisons, the size and orientation of the contours should not impair the detection, but from the tests we've been running, this is more relevant with the next module that compares contours using a PGH histogram. |
| − | , this is more relevant with the next module that compares contours using a PGH histogram. | ||
===== pdp_opencv_pgh_compare / pix_opencv_pgh_compare ===== | ===== pdp_opencv_pgh_compare / pix_opencv_pgh_compare ===== | ||
| + | |||
| + | ( note : not available with OpenCV 3.x ) | ||
This object is very similar to the previous one, except that for comparing contours, it uses a PGH histogram instead of the Hu moments. | This object is very similar to the previous one, except that for comparing contours, it uses a PGH histogram instead of the Hu moments. | ||
| Line 688: | Line 700: | ||
===== pdp_opencv_of_bm / pix_opencv_of_bm ===== | ===== pdp_opencv_of_bm / pix_opencv_of_bm ===== | ||
| − | This object, as the next two following ones, calculates the optical flow, trying to correlate the movement of blocks from a frame to next one, this algorithm is known as Block | + | ( replaced in 3.x by pdp_openv_of_fb ) |
| − | + | ||
| + | This object, as the next two following ones, calculates the optical flow, trying to correlate the movement of blocks from a frame to next one, this algorithm is known as Block Matching. It uses a variable size of blocks that can be adjusted. | ||
Input Parameters : | Input Parameters : | ||
| Line 715: | Line 728: | ||
[[Image:Of-bm.png]] | [[Image:Of-bm.png]] | ||
| + | ===== pdp_opencv_of_hs / pix_opencv_of_hs ===== | ||
| − | + | ( replaced in 3.x by pdp_openv_of_fb ) | |
This object is very similar to the previous one but does not operate on blocks, rather on each individual pixel. It uses the Horn and Schunck algorithm for the identification of | This object is very similar to the previous one but does not operate on blocks, rather on each individual pixel. It uses the Horn and Schunck algorithm for the identification of | ||
| Line 741: | Line 755: | ||
[[Image:Of-hs.png]] | [[Image:Of-hs.png]] | ||
| + | ===== pdp_opencv_of_lk / pix_opencv_of_lk ===== | ||
| − | + | ( replaced in 3.x by pdp_openv_of_fb ) | |
This object is almost the same as the previous one, except that it uses the Lucas/Kanade algorithm for the identification and tracking of points. | This object is almost the same as the previous one, except that it uses the Lucas/Kanade algorithm for the identification and tracking of points. | ||
| Line 763: | Line 778: | ||
[[Image:Of-lk.png]] | [[Image:Of-lk.png]] | ||
| − | |||
=== DOWNLOAD & INSTALL === | === DOWNLOAD & INSTALL === | ||
| Line 771: | Line 785: | ||
Binary packages once existed, but now they are not updated anymore. | Binary packages once existed, but now they are not updated anymore. | ||
| − | ===== Install from sources | + | ===== Install from sources ===== |
First, install OpenCV, on Debian systems : 'sudo apt-get install libopencv*' | First, install OpenCV, on Debian systems : 'sudo apt-get install libopencv*' | ||
| + | |||
| + | ====== get the _SOURCES_ of the package ====== | ||
===== pix_opencv ===== | ===== pix_opencv ===== | ||
| Line 793: | Line 809: | ||
* note : the following objects are not available for 3.x : | * note : the following objects are not available for 3.x : | ||
| − | pix_opencv_motempl.cc pix_opencv_knear.cc pix_opencv_bgstats.cc pix_opencv_pgh_compare.cc | + | pix_opencv_motempl.cc |
| − | pix_opencv_of_bm.cc pix_opencv_of_hs.cc pix_opencv_of_lk.cc' | + | pix_opencv_knear.cc |
| + | pix_opencv_bgstats.cc | ||
| + | pix_opencv_pgh_compare.cc | ||
| + | pix_opencv_of_bm.cc | ||
| + | pix_opencv_of_hs.cc | ||
| + | pix_opencv_of_lk.cc' | ||
| − | * if you | + | * if you need these objects, look into installing pdp_opencv below and use them in your gem environment with : |
* [pdp_opencv] -> [pdp2gem from pidip] -> [pix_texture] | * [pdp_opencv] -> [pdp2gem from pidip] -> [pix_texture] | ||
| Line 803: | Line 824: | ||
pdp_opencv is now version 0.2-rc7 and is maintained, unlike pix_opencv | pdp_opencv is now version 0.2-rc7 and is maintained, unlike pix_opencv | ||
| − | ====== | + | ====== pdp_opencv for OpenCV 2.x/3.x ====== |
| − | |||
| − | |||
git clone http://giss.tv/~git/git.cgi/pdp_opencv-3.x.git | git clone http://giss.tv/~git/git.cgi/pdp_opencv-3.x.git | ||
| − | + | note for version 3.x : | |
* pdp_opencv_bgstats is now replaced by pdp_opencv_bgsegm ( much better ) | * pdp_opencv_bgstats is now replaced by pdp_opencv_bgsegm ( much better ) | ||
| Line 816: | Line 835: | ||
* pdp_pgh_compare is not available, but you can use pdp_opencv_hu_compare instead. | * pdp_pgh_compare is not available, but you can use pdp_opencv_hu_compare instead. | ||
| − | |||
| + | ====== pdp_opencv for OpenCV 4.x ( without pkg-config !!! )====== | ||
| + | |||
| + | git clone http://giss.tv/~git/git.cgi/pdp_opencv-4.x.git | ||
| + | |||
| + | note for version 4.x : | ||
| + | |||
| + | * missing objects : | ||
| + | |||
| + | pdp_opencv_bgstats | ||
| + | pdp_opencv_of_bm | ||
| + | pdp_opencv_of_hs | ||
| + | pdp_opencv_of_lk | ||
| + | pdp_opencv_camshift | ||
| + | pdp_opencv_knear | ||
| + | pdp_opencv_svm | ||
| + | pdp_opencv_haarscascade | ||
| + | pdp_opencv_pgh_compare | ||
| − | + | ====== get the _SOURCES_ of PD and PDP or GEM ====== | |
| + | |||
( it might not work if the version is different ) | ( it might not work if the version is different ) | ||
| − | + | ====== cd into the sources you cloned ====== | |
cd pix_opencv-2.x | cd pix_opencv-2.x | ||
| Line 829: | Line 865: | ||
or | or | ||
cd pdp_opencv-3.x | cd pdp_opencv-3.x | ||
| + | or | ||
| + | cd pdp_opencv_4.x | ||
| − | + | ====== configure the package ====== | |
./configure --with-pd=<path to pd _sources_> --with-gem=<path to gem _sources_> | ./configure --with-pd=<path to pd _sources_> --with-gem=<path to gem _sources_> | ||
| Line 852: | Line 890: | ||
cp *.pd_linux /usr/lib/pd/extra// | cp *.pd_linux /usr/lib/pd/extra// | ||
cp *.pd /usr/lib/pd/doc/5.reference | cp *.pd /usr/lib/pd/doc/5.reference | ||
| − | |||
next time you start pd, the library should appear in the help browser. | next time you start pd, the library should appear in the help browser. | ||
| Line 861: | Line 898: | ||
===== Binary package ===== | ===== Binary package ===== | ||
| − | * install Pd-extended | + | * install Pd-extended or Pd-l2ork |
* download OpenCV Framework : [[http://www.ient.rwth-aachen.de/~asbach/OpenCV-Private-Framework-1.2.dmg]] from http://www.ient.rwth-aachen.de/cms/software/opencv/ | * download OpenCV Framework : [[http://www.ient.rwth-aachen.de/~asbach/OpenCV-Private-Framework-1.2.dmg]] from http://www.ient.rwth-aachen.de/cms/software/opencv/ | ||
| Line 874: | Line 911: | ||
next time you start pd, the library should appear in the help browser. | next time you start pd, the library should appear in the help browser. | ||
| − | |||
===== Install from sources ===== | ===== Install from sources ===== | ||
| − | + | * get the _SOURCES_ of the package : | |
| − | + | ===== pix_opencv ===== | |
| − | + | pix_opencv is now version 0.2-rc6 | |
| − | + | Due to the big differences between OpenCV 2.x for which it was developed at first and OpenCV 3.x, we set up 2 separate repositories that could be updated independently : | |
| − | + | ====== pix_opencv for OpenCV 2.x ====== | |
| − | |||
| − | ==== pix_opencv for OpenCV 2.x ==== | ||
git clone http://giss.tv/~git/git.cgi/pix_opencv-2.x.git | git clone http://giss.tv/~git/git.cgi/pix_opencv-2.x.git | ||
( tested with OpenCV 2.4.10 ) | ( tested with OpenCV 2.4.10 ) | ||
| − | ==== | + | ====== pix_opencv for OpenCV 3.x ====== |
| + | |||
| + | git clone http://giss.tv/~git/git.cgi/pix_opencv-3.x.git | ||
| + | ( tested with OpenCV 3.2.0 ) | ||
| + | |||
| + | * note : the following objects are not available for 3.x : | ||
| − | + | pix_opencv_motempl.cc | |
| − | + | pix_opencv_knear.cc | |
| + | pix_opencv_bgstats.cc | ||
| + | pix_opencv_pgh_compare.cc | ||
| + | pix_opencv_of_bm.cc | ||
| + | pix_opencv_of_hs.cc | ||
| + | pix_opencv_of_lk.cc | ||
| − | + | * if you miss these objects, look into installing pdp_opencv below and use them in your gem environment with : | |
| + | * [pdp_opencv] -> [pdp2gem from pidip] -> [pix_texture] | ||
| − | + | ===== pdp_opencv ===== | |
| − | |||
| − | + | pdp_opencv is now version 0.2-rc7 and is maintained, unlike pix_opencv | |
| − | + | ====== pdp_opencv for OpenCV 2.x/3.x ====== | |
| − | |||
| − | + | It is maintained in one single repository : | |
git clone http://giss.tv/~git/git.cgi/pdp_opencv-3.x.git | git clone http://giss.tv/~git/git.cgi/pdp_opencv-3.x.git | ||
| − | |||
| − | note : | + | note for version 3.x : |
| + | |||
| + | * pdp_opencv_bgstats is now replaced by pdp_opencv_bgsegm ( much better ) | ||
| + | |||
| + | * pdp_opencv_of_bm, pdp_opencv_of_lk, pdp_opencv_of_hs are replaced by pdp_opencv_of_fb ( much better ) | ||
| + | |||
| + | * pdp_pgh_compare is not available, but you can use pdp_opencv_hu_compare instead. | ||
| + | |||
| + | * download OpenCV Framework : [[http://www.ient.rwth-aachen.de/~asbach/OpenCV-Private-Framework-1.2.dmg]] from http://www.ient.rwth-aachen.de/cms/software/opencv/ | ||
| + | |||
| + | * open it and drop the OpenCV.framework into your /Library/Frameworks/ directory | ||
| − | + | * get the _SOURCES_ of the pd you are using and of the GEM that you are loading ( it might not work if the version is different ) | |
| − | |||
* cd into the pix_opencv/pdp_opencv folder : | * cd into the pix_opencv/pdp_opencv folder : | ||
| Line 923: | Line 974: | ||
or | or | ||
cd pix_opencv-3.x | cd pix_opencv-3.x | ||
| − | |||
| − | |||
or | or | ||
cd pdp_opencv-3.x | cd pdp_opencv-3.x | ||
| Line 935: | Line 984: | ||
./configure --with-pd=/usr/local/pd --with-gem=/usr/local/pd/gem | ./configure --with-pd=/usr/local/pd --with-gem=/usr/local/pd/gem | ||
| + | |||
| + | or | ||
| + | |||
| + | ./configure --with-pd=<path to pd _sources_> --with-pdp=<path to pdp _sources_> | ||
* then, compile it :: | * then, compile it :: | ||
Latest revision as of 15:18, 18 September 2020
Contents
- 1 pdp_opencv & pix_opencv
- 1.1 CONTENTS
- 1.1.1 Filtering Modules
- 1.1.2 Pre-processing Modules
- 1.1.3 Analysis Modules
- 1.1.3.1 pdp_opencv_floodfill / pix_opencv_floodfill
- 1.1.3.2 pdp_opencv_contours_boundingrect / pix_opencv_contours_boundingrect
- 1.1.3.3 pdp_opencv_contours_convexity / pix_opencv_contours_convexity
- 1.1.3.4 pdp_opencv_contours_convexhull / pix_opencv_contours_convexhull
- 1.1.3.5 pdp_opencv_lk / pix_opencv_lk
- 1.1.3.6 pdp_opencv_surf / pix_opencv_surf
- 1.1.3.7 pdp_opencv_motempl / pix_opencv_motempl
- 1.1.3.8 pdp_opencv_hist_compare / pix_opencv_hist_compare
- 1.1.3.9 pdp_opencv_haarcascade / pix_opencv_haarcascade
- 1.1.3.10 pdp_opencv_camshift / pix_opencv_camshift
- 1.1.3.11 pdp_opencv_hough_lines / pix_opencv_hough_lines
- 1.1.3.12 pdp_opencv_hough_circles / pix_opencv_hough_circles
- 1.1.3.13 pdp_opencv_match_shape / pix_opencv_match_shape
- 1.1.3.14 pdp_opencv_pgh_compare / pix_opencv_pgh_compare
- 1.1.3.15 pdp_opencv_knear / pix_opencv_knear
- 1.1.3.16 pdp_opencv_of_bm / pix_opencv_of_bm
- 1.1.3.17 pdp_opencv_of_hs / pix_opencv_of_hs
- 1.1.3.18 pdp_opencv_of_lk / pix_opencv_of_lk
- 1.2 DOWNLOAD & INSTALL
- 1.3 IMPORTANT TIPS & KNOWN BUGS
- 1.4 FOR DEVELOPPERS
- 1.1 CONTENTS
pdp_opencv & pix_opencv
Open CV bindings for PureData (for PDP and GEM libraries).
Most of the code here is inspired by the Open CV examples code and/or taken from the book : "Learning Open CV : Computer Vision with the Open CV library" by Gary Bradski & Adrian Kaehler, O'Reilly.
You can find an introduction to computer vision and to this package here : [[1]].
We're encouraging people to beta-test it and report us any problems encountered :
Lluis Gomez i Bigorda ( lluisgomez _at_ hangar _dot_ org )
and
Yves Degoyon ( ydegoyon _at_ gmail _dot_ com ).
CONTENTS
Filtering Modules
pdp_opencv_threshold / pix_opencv_threshold
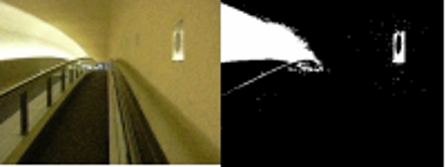
Many of Open CV analysis object ( blob detection, contours detection ) operate better on binary images, this means on an image that is reduced to the pixels above or below a certain level of intensity. The object threshold applies a fixed-level threshold to frames. It produces a binary like image but still in RGB (RGBA or whatever it was before).
Input Parameters :
  mode :
  CV_THRESH_BINARY :  maxvalue if src>threshold
  CV_THRESH_BINARY_INV :  maxvalue if src<threshold
  CV_THRESH_TRUNC : threshold if src>threshold
  CV_THRESH_TOZERO : 0 if src<threshold
  CV_THRESH_TOZERO_INV : 0 if src>threshold
threshold : value of the threshold for testing pixels.
maxvalue : maxvalue used for BINARY mode, default 255.
pdp_opencv_athreshold / pix_opencv_athreshold
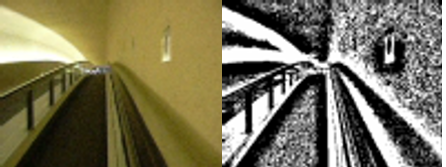
For some kind of images, where some zones are really dark and some zones are really bright, a fixed-level threshold might be too desctructive, and for such cases, we need to use an adaptative threshold filter, where the level of the threshold depends on the average luminosity in the block of surrounding pixels.
Input Parameters :
  method :
  CV_ADAPTIVE_THRESH_MEAN_C :  use as a threshold the average value of pixels in the size x size surrounding pixels block.
  CV_ADAPTIVE_THRESH_GAUSSIAN_C : applies a gaussian  weight to the pixels around the current pixel.
  Pixels in the center have a heavier weight than the ones on the  outskirts of the block.
  mode :
  CV_THRESH_BINARY :  maxvalue if src>threshold
  CV_THRESH_BINARY_INV :  maxvalue if src<threshold
blocksize : size of the surrounding blosk to calculate the threshold.
dim : attenuation of the threshold, the real threshold used is the calculated threshold minus dim.
maxvalue : maxvalue used for BINARY mode, default 255.
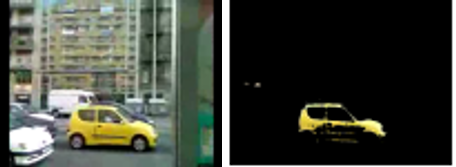
pdp_opencv_bgsubstract / pix_opencv_bgsubstract
This filter is used in motion detection when you want to distinguish moving objects from a static background.
It takes an image as a background reference when receiving a 'SET' message and then compare each incoming frame with that, using a threshold value to compare the pixels. It is useful if you want to detect objects that are in front of an static background and you want to isolate the foreground silhouettes of moving objects.
Input Parameters :
SET message : This is used to capture the background.
threshold : value of the threshold for testing if pixels have changed.
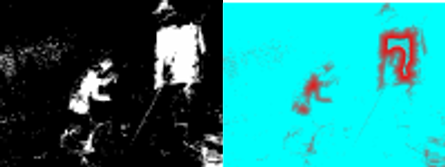
pdp_opencv_bgstats / pix_opencv_bgstats
( replaced in 3.x by pdp_opencv_bgsegm )
This object is very similar to bgsubstract but it uses a time parameter and a statistical model that makes objects considered as the foreground disappear after a while and then be considered as background. So it behaves as an adaptive background extractor.
It also performs a supplemental stage os noise filtering through internal morphology ( erosion / dilation ) and eliminates small blobs that can be considered as noise.
The output of the foreground is in binary mode.
Input Parameters :
RESET message : Reset the backgroumd to current frame.
alpha : period of time after which a foreground object is considered as background ( default : 0.1 seconds ).
erode : number of iterations of the erode/dilate filter to eliminate noise.
minarea : minimum sie of the objects shown in the foreground.
pdp_opencv_channels
This object is a simple RGB channels separator that can be useful when it's necessary to detect some specific hues in a video input. It only exists in the version for PDP, in GEM you can use pix_bitmask instead.
Input Parameters :None.
pdp_opencv_colorfilt
This filter is used to filter a certain color in the video input, isolating and identifying objects which are of this given color, using a tolerance factor for the identificatio n of the color. The selected color can be picked from the video and set through RGB inlets.
Input Parameters :
second inlet : R component of the selected color.
third inlet : G component of the selected color.
fourth inlet : B component of the selected color.
tolerance : tolerance factor for the identification of the color.
pick px py : pick the color from the incoming video.
Pre-processing Modules
These modules are useful to pre-process the image before any further analysis.
The difference with analysis modules is that they don't output any analysis data.
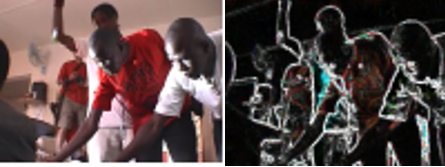
pdp_opencv_edge / pix_opencv_edge
This filter is a classical edge detector that detects changes of pixels in the image ( using first degree gradient ), it can be useful to pre-process an image before passing it to a contour processing analysis object.
Input Parameters :
second inlet : threshold to detect edges.
pdp_opencv_laplace / pix_opencv_laplace
This filter is also an edge detector but it uses a calculation of the second derivative known as Laplace in both directions and detects more accurately the important edges in a picture.
Input Parameters :
second inlet : aperture size ( number of points considered to calculate the derivative ).
pdp_opencv_morphology / pix_opencv_morphology
This technique is aimed at distinguishing more precisely the connected pixels blobs in an image using the algorithms of opening/closing and erosion/dilation that increase or red uce the size of zones of bright or dark pixels.
It works better on binary image and is helpful to join some zones in a picture that define a wider zone to be processed or tracked.
Input Parameters :
mode : switch between open/close and dilate/erode algorithms.
  shape : form of the kernel that is used in the algorithm.
  It can be one of : rectangle (0), elliptic (1) or cross-shaped (2).
second inlet : the second inlet indicates the number of iterations that has the effect of accentuating the transformation.
pdp_opencv_distrans / pix_opencv_distrans
Another filter that is really close to morphology is the 'distance' algorithm filter that skeletizes the different forms in an image and let's you track a simplified form.
It works better on binary images and is particularly appropriate to simplified silhouettes.
Input Parameters :
type (0/3/5) : optionally uses a mask in the transformation. 0 is none.
second inlet : threshold to detect edges.
voronoi (0/1) : activates/desactivates the voronoi triangles partitioning.
pdp_opencv_dft / pix_opencv_dft
This filter is very useful in image analysis as it transform an image from its spacial representation to a frequency domain representation, modelizing an image as an infinite co mbination of sinusoidal waves. This is know as the Discrete Fourier Transform, very well known of people working in sound processing and it can be useful also in image analysis. It first binarize the incoming images and then calculates the Fourier magnitude and phase diagrams. As it is quite greedy of ressources, it only process a frame when it receives a 'bang' message.
Input Parameters :
bang message : triggers the calculation of a DFT.
Analysis Modules
These modules are the last stage in a processing chain and try to extract significant analysis data from the video stream.
pdp_opencv_floodfill / pix_opencv_floodfill
This module marks some pixel zones that identifies some blobs, e.g zones of adjacent pixels of almost the same intensity and color, taking into account a tolerance in the variat ion of pixels. It also repaints these zones in a specific color.
Input Parameters :
second inlet : lower tolerance for pixels.
third inlet : upper tolerance for pixels.
connectivity : use 4-points or 8-points connectivity mode.
color : activates/desactivates color mode.
mark x y : mark a blob containing this pixel.
delete n : delete a marker.
clear : delete all markers.
fillcolor n r g b : set the fill color for blob n.
Output :
second outlet : position of each marked blobs in the form 'number x y width height'.
pdp_opencv_contours_boundingrect / pix_opencv_contours_boundingrect
This object calculates the up-right bounding rectangle of all contours of an image. This object works better on binary images distinguishing white pixels zones on a black backgr ound.
Input Parameters :
mode : contour detection mode ( see cvFindContours [1] ).
method : contour detection method ( see cvFindContours [1] ).
second inlet : minimal size of a contour.
third inlet : maximal size of a contour.
  maxmove : maximum movement of a contour between 2 frames
  ( used for identification/numbering of contours ).
ftolerance : nnumber of frames where a contour can disappear without being considered as lost ( used for identification/numbering of contours ).
nightmode 0/1 : only shows the detected contours.
draw 0/1 : draw the contours.
show 0/1 : show the bounding rectangle or not.
Output :
second outlet : position of each contour in the form 'number x y width height'
third outlet : number of detected contours.
pdp_opencv_contours_convexity / pix_opencv_contours_convexity
This object looks for the convexity curves of the biggest contour of an image.
Each convexity curve is defined by three points : the starting point, the ending point and the depth point. This object works better on binary images.
Input Parameters : none.
Output :
second outlet : the number of convexity curves of the biggest contour.
third outlet : the three points defining a convexity curve in the form : 'number xstart ystart xdepth ydepth xend yend'
pdp_opencv_contours_convexhull / pix_opencv_contours_convexhull
This object draws the convex hull of the biggest contour found in a video input. A convex hull is a polygon that approximates the contour.
Input Parameters :
accuracy : polygon approximation accuracy.
mode : contours retrieval mode.
method : contours retrieval methos.
nightmode (0/1) : show/hide original video.
Output :
second outlet : the number of points in the convex hull.
third outlet : the list of the points in the convex hull as a list of coordinates : x1 y1 x2 y2 ... xn yn.
pdp_opencv_lk / pix_opencv_lk
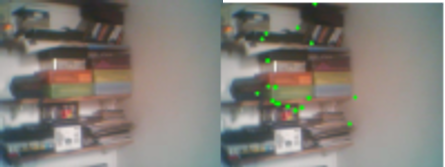
This object detects remarkable points in a contour, using Shi and Tomasi point detection algorithm, enabling to mark peculiar points like angles and asperities.
You can then choose the points you want to track by clicking on them or select all of them for tracking, using Lukas-Kanade ( hence lk ) tracking technique.
Input Parameters :
init : re-calculates contours and most significative points.
mindistance : minimal distance between points.
quality : quality factor used in approximation. This behaves like a threshold on the gradient of remarkable points.
mark x y : mark a point to be tracked.
mark all : mark all points.
mark none : unmark all points.
delete n : delete a marker.
clear : delete all markers.
maxmove n : maximum displacement of a point between ywo frames ( used for identification / numbering ).
ftolerance n : number of frames where a point can disappear ( used for identification / numbering ).
delaunay on : draw a delaunay triangulation between all points.
delaunay off : disactivate the delaunay.
pdelaunay <n> <thresgold> : draw a delaunay containing the point n and all points which difference with point n is below threshold.
nightmode (0/1) : show/hide original video frame.
second inlet : window size for calculating the gradient.
Output :
second outlet : for each marked point, point position in the form : 'number x y'.
pdp_opencv_surf / pix_opencv_surf
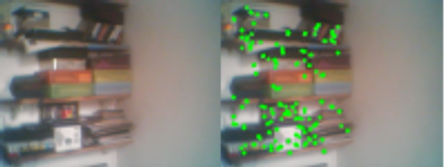
This object is very similar to Lukas-Kanade point tracking technique, but it uses the SURF ( Speed Up Robust Features ) to detect remarkable points. It generally detects more po ints than the lk detection algorithms.
This object seems to be available only with Open CV 1.1.0, it will not work with Open CV 1.0.0.
Input Parameters :
hessian : hessian threshold for the detection of points. This influences the number of detected points.
mark x y : mark a point to be tracked.
mark all : mark all points.
mark none : unmark all points.
delete n : delete a marker.
clear : delete all markers.
maxmove n : maximum displacement of a point between two frames ( used for identification / numbering ).
ftolerance n : number of frames where a point can disappear ( used for identification / numbering ).
delaunay on : draw a delaunay triangulation between all points.
delaunay off : disactivate the delaunay.
pdelaunay <n> <threshold> : draw a delaunay containing the point n and all points which difference with point n is below threshold.
nightmode (0/1) : show/hide original video frame.
Output :
second outlet : for each marked point, point position in the form : 'number x y'.
pdp_opencv_motempl / pix_opencv_motempl
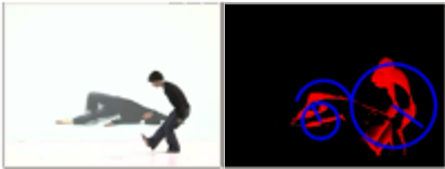
This object tracks movement of detected objects using the history of motion on a variable number of frames. It operates internally with binary images, thresholding the incoming frames and build an history of image changes with timestamps.
Input Parameters :
second inlet : value of threshold to distinguish blobs.
third inlet : minimal size of a detected blob.
fourth inlet : maximal size of a detected blob.
frame_buffer_size : number of frames in the motion history ( default 4 ).
max_time_delta : maximum time of a pixel change in the motion history for detecting a movement.
min_time_delta : minimum time of a pixel change in the motion history for detecting a movement.
aperture ( 1 | 3 | 5 | 7 ) : aperture size for the calculated derivative.
mhi_duration : duration of displaying the detected motions.
Output :
second outlet : for each blob detected, the position, the size of the blob and the direction of its movement in the form “number x y width height angle”.
pdp_opencv_hist_compare / pix_opencv_hist_compare
This object memorize and draw the statistical composition of an image in the form of an histogram of the hue and saturation of the pixels. Therefore, it works only on color fram es.
You can record up to 80 histograms that defines the composition of the image and by comparing them to the actual frame entering, you can recognize specific configuration of the input image if it has been memorized before.
This can work quite well to recognize special gestures like from a human hand and can be used in a kind of gesture command to a pd patch.
Input Parameters :
second inlet : send there a number to memorize a specific histogram.
Output :
second outlet : the closest stored histogram to the actual entering frame.
third outlet : all measured distances with presently stored histograms in the form 'd1 d2 d3...dn'.
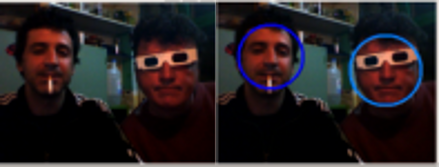
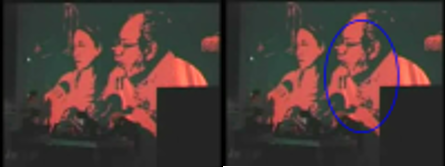
pdp_opencv_haarcascade / pix_opencv_haarcascade
This object loads a Haar's cascade decision tree in the form of an XML file, that is based on Haar's technique of dividing an image in squares and calculate some pixels sums on these squares, and the differences between them.
Using this technique, we can detect some peculiar form in an image ( face, mouth, eyes, ... ), but this needs to be trained to have the right coefficients stored in the XML with
a great number of sample images ( > 10.000 ). Open CV provides a tool to create such a decision tree, but the task is fastidious and not easy.
There are various haar's cascade available on the web like this collection : [[2]].
Input Parameters :
load <xml file> : load an XML Haar's cascade decision tree.
mode (0/1) : use edge detect
these squares, and the differences between them.
Using this technique, we can detect some peculiar form in an image ( face, mouth, eyes, ... ), but this needs to be trained to have the right coefficients stored in the XML with
a great number of sample images ( > 10.000 ). Open CV provides a tool to create such a decision tree, but the task is fastidious and not easy.
There are various haar's cascade available on the web like this collection : [[3]].
Input Parameters :
load <xml file> : load an XML Haar's cascade decision tree.
mode (0/1) : use edge detection or not.
min_size : minimal size of a detected object.
min_neighbours : minimum number (minus 1) of neighbour rectangles that makes up an object ( default 2 ).
scale_factor : scale applied for block size.
ftolerance : number of frames where an object can temporarily disappear ( used for identification / numbering ).
clear : clear all objects markers.
Output :
second outlet : number of detected objects.
third outlet : coordinates of each object identified by a circle under the form 'number x y radius'.
pdp_opencv_camshift / pix_opencv_camshift
This object implements the Continuously Adaptive Mean-shift tracking algorithm (CAM).
You can select an object with the mouse and it starts tracking the object from a rectangular zone around this point, but adapting the zone at each iteration.
It gives also the orientation of the object. It's working in the HSV colorspace, distinguishing the hue from other fields S, V.
Input Parameters :
vmin : V pre-filtering minimal value.
vmax : V pre-filtering maximal value.
smin : S pre-filtering minimal value.
backproject (0/1) : show the backproject ( binary image of selected pixels ).
rwidth : initial width of the tracking zone.
rheight : initial height of the tracking zone.
track x y : track an object containing this point.
Output :
second outlet : coordinates, size and orientation of the track object ( only one ) in the form : 'x y width height angle'.
pdp_opencv_hough_lines / pix_opencv_hough_lines
This object detects segments of lines in the incoming frames using the Hough detection algorithm.
Input Parameters :
  mode : detection mode used for the algorithm, one of :
  CV_HOUGH_STANDARD : full lines.
  CV_HOUGH_PROBABILISTIC : line segments.
  CV_HOUGH_MULTI_SCALE : line segments.
maxlines : maximum number of detected lines.
threshold : difference threshold for detection of edges.
minlength : minimal length of a detected segment.
gap : gap between lines ( for mode CV_HOUGH_PROBABILISTIC )
aresolution : angle resolution ( for mode CV_HOUGH_MULTI_SCALE )
dresolution : distance resolution ( for mode CV_HOUGH_MULTI_SCALE )
nightmode (0/1) : show/hide the incoming video frame.
Output :
second outlet : for each detected line, coordinates of starting and ending points in the form : 'number xstart ystart xend yend'.
pdp_opencv_hough_circles / pix_opencv_hough_circles
This object detects segments of circles in the incoming frames using the Hough detection algorithm.
Most of the time, the circles do not really exist but are 'almost there'.
Input Parameters :
maxcircles : maximum number of detected circles.
threshold : threshold used in the edges detection ( cvCanny ).
threshold2 : threshold used for the detection of the centers.
mindist : minimum distance between circles centers.
resolution : resolution of the accumulator.
nightmode (0/1) : show/hide the incoming video frame.
Output :
second outlet : for each detected circles, coordinates of the center and radius in the form : 'number xcenter ycenter radius'.
pdp_opencv_match_shape / pix_opencv_match_shape
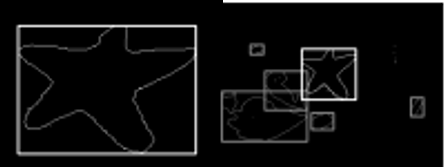
This object takes two inputs, generally an incoming video stream and pattern images, also in form of a video stream and tries to detect the patterns in the incoming video frames.
It operates as follows : it extracts from the pattern images the biggest contour and compare the contours of the incoming video using cvMatchShapes, which compares contours calculating their Hu moments, characteristics of the topology of the contours.
Synopsis :
pdp_opencv <nbpatterns> <pattern_width> <pattern_height>
nbpatterns : number of patterns.
pattern_width : width of the patterns ( they must all be of the same size ).
pattern_height : height of the patterns.
Parameters Settings :
index : set index where the next pattern received will be stored.
minsize : minimal size of threated contours, to remove small shapes and noise.
  method : method used in cvMatchShapes which can be one of :
  CV_CONTOURS_MATCH_I1, CV_CONTOURS_MATCH_I2 or CV_CONTOURS_MATCH_I3 : the difference between the Hu moments are computed with different formulas ( see cvMatchShapes documentation ).
clear : recalculate the contour of the pattern image if ever it changes.
criteria : minimal distance under which the contours are considered as detected and highlighted.
Output :
first outlet : the contours of the incoming video stream with detected contours highlighted.
second outlet : the pattern image contour.
third outlet : the index of the closest pattern to the incoming stream and its distance to it.
fourth outlet : the index, coordinates and sizes of detected matching contours.
note : as the contours are all normalized before the comparisons, the size and orientation of the contours should not impair the detection, but from the tests we've been running, this is more relevant with the next module that compares contours using a PGH histogram.
pdp_opencv_pgh_compare / pix_opencv_pgh_compare
( note : not available with OpenCV 3.x )
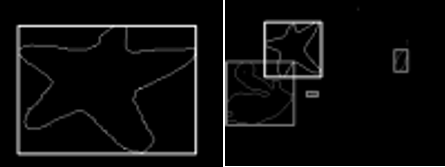
This object is very similar to the previous one, except that for comparing contours, it uses a PGH histogram instead of the Hu moments.
The PGH histogram is an histogram of the convexities of the contours storing the size and angle of each curve. This method is statistical and is better for detecting contours r egardless of their size and orientation.
Input Parameters :
minsize : minimal size of threated contours, to remove small shapes and noise.
clear : recalculate the contour of the pattern image if ever it changes.
criteria : minimal distance under which the contours are considered as detected and highlighted.
Output :
first outlet : the contours of the incoming video stream with detected contours highlighted.
second outlet : the pattern image contour.
third outlet : the minimum distance between the contours of the incoming stream with the pattern image.
fourth outlet : the coordinates of detected matching contours.
note : this object is less sensitive to the change of size and orientation, but as it is statistical, it can also confuse a contour for another that would include the same number of curves with the same angle.
pdp_opencv_knear / pix_opencv_knear
This object compares the incoming video frames with a collection of samples loaded from a directory.
The idea is to implement a kind of form recognition close to some OCR techniques that recognizes incoming characters calculating the distance from the current input with all the
samples of a database. The calculated distance just calculates the number of pixels that are different after binarizing them.
Input Parameters :
load <directory> <count> : load all the samples from a database. The directory must contain files named : 000.png, 001.png....count.png.
bang : calculates the distance of the incoming video frame with the database.
Output :
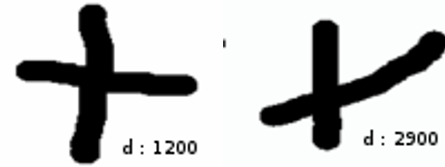
second outlet : the distance of the incoming image with the database.
Here the database is a database of '+' signs and a distance smaller than 2000 detects a more-or-less well-formed sign but this threshold ( 2000 ) depends on the size of the samp
les and on the tolerance you want to give to the algorithm, so it must be adapted to each particular case.
pdp_opencv_of_bm / pix_opencv_of_bm
( replaced in 3.x by pdp_openv_of_fb )
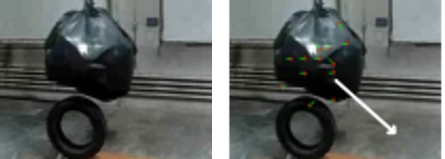
This object, as the next two following ones, calculates the optical flow, trying to correlate the movement of blocks from a frame to next one, this algorithm is known as Block Matching. It uses a variable size of blocks that can be adjusted.
Input Parameters :
blocksize <width> <height> : sets the size of the blocks.
shiftsize <width> <height> : sets the coordinate increment between blocks ( blocks can be overlapping ).
maxrange <width> <height> : sets the size of the pixels scanned around a block ( the actual region of search ).
threshold <value> : sets the threshold of movement for a single block.
minblocks <value> : sets the minimum number of blocks that moved over which a global movement is detected.
useprevious <0/1> : use previous results of movements to calculate the new one ( cumulative movements ).
nightmode <0/1> : show or hide the original video.
Output :
second outlet : the average angle of the blocks movement.
third outlet : the maximum movement of a block with its amplitude and its angle in the form : <amplitude> <angle>.
pdp_opencv_of_hs / pix_opencv_of_hs
( replaced in 3.x by pdp_openv_of_fb )
This object is very similar to the previous one but does not operate on blocks, rather on each individual pixel. It uses the Horn and Schunck algorithm for the identification of
pixels.
Input Parameters :
lambda <value> : sets the value of the Lagrange multiplier.
threshold <value> : sets the threshold of movement for a single piksel.
minblocks <value> : sets the minimum number of blocks of one pixel that moved over which a global movement is detected.
useprevious <0/1> : use previous results of movements to calculate the new one ( cumulative movements ).
nightmode <0/1> : show or hide the original video.
Output :
second outlet : the average angle of the blocks movement.
third outlet : the maximum movement of a block with its amplitude and its angle in the form : <amplitude> <angle>.
pdp_opencv_of_lk / pix_opencv_of_lk
( replaced in 3.x by pdp_openv_of_fb )
This object is almost the same as the previous one, except that it uses the Lucas/Kanade algorithm for the identification and tracking of points.
Input Parameters :
winsize <width> <height> : size of the averaging window to group pixels.
threshold <value> : sets the threshold of movement for a single piksel.
minblocks <value> : sets the minimum number of blocks of one pixel that moved over which a global movement is detected.
nightmode <0/1> : show or hide the original video.
Output :
second outlet : the average angle of the blocks movement.
third outlet : the maximum movement of a block with its amplitude and its angle in the form : <amplitude> <angle>.
DOWNLOAD & INSTALL
LINUX
Binary packages once existed, but now they are not updated anymore.
Install from sources
First, install OpenCV, on Debian systems : 'sudo apt-get install libopencv*'
====== get the _SOURCES_ of the package ======
===== pix_opencv =====
pix_opencv is now version 0.2-rc6
Due to the big differences between OpenCV 2.x for which it was developed at first and OpenCV 3.x, we set up 2 separate repositories that could be updated independently :
====== pix_opencv for OpenCV 2.x ======
git clone http://giss.tv/~git/git.cgi/pix_opencv-2.x.git ( tested with OpenCV 2.4.10 )
====== pix_opencv for OpenCV 3.x ======
git clone http://giss.tv/~git/git.cgi/pix_opencv-3.x.git ( tested with OpenCV 3.2.0 )
* note : the following objects are not available for 3.x :
  pix_opencv_motempl.cc
  pix_opencv_knear.cc
  pix_opencv_bgstats.cc
  pix_opencv_pgh_compare.cc
  pix_opencv_of_bm.cc
  pix_opencv_of_hs.cc
  pix_opencv_of_lk.cc'
    * if you need these objects, look into installing pdp_opencv below and use them in your gem environment with :
    * [pdp_opencv] -> [pdp2gem from pidip] -> [pix_texture]
===== pdp_opencv =====
pdp_opencv is now version 0.2-rc7 and is maintained, unlike pix_opencv
====== pdp_opencv for OpenCV 2.x/3.x ======
git clone http://giss.tv/~git/git.cgi/pdp_opencv-3.x.git
note for version 3.x :
* pdp_opencv_bgstats is now replaced by pdp_opencv_bgsegm ( much better )
* pdp_opencv_of_bm, pdp_opencv_of_lk, pdp_opencv_of_hs are replaced by pdp_opencv_of_fb ( much better )
* pdp_pgh_compare is not available, but you can use pdp_opencv_hu_compare instead.
====== pdp_opencv for OpenCV 4.x ( without pkg-config !!! )======
git clone http://giss.tv/~git/git.cgi/pdp_opencv-4.x.git
note for version 4.x :
* missing objects :
       pdp_opencv_bgstats
       pdp_opencv_of_bm
       pdp_opencv_of_hs
       pdp_opencv_of_lk
       pdp_opencv_camshift
       pdp_opencv_knear
       pdp_opencv_svm
       pdp_opencv_haarscascade
       pdp_opencv_pgh_compare
 ====== get the _SOURCES_ of PD and PDP or GEM ======

   ( it might not work if the version  is different )
====== cd into the sources you cloned ======
 cd pix_opencv-2.x
 or
 cd pix_opencv-3.x
 or
 cd pdp_opencv-3.x
 or
 cd pdp_opencv_4.x
====== configure the package ======
./configure --with-pd=<path to pd _sources_> --with-gem=<path to gem _sources_>
for example :
./configure --with-pd=/usr/local/pd --with-gem=/usr/local/pd/gem
or
./configure --with-pd=<path to pd _sources_> --with-pdp=<path to pdp _sources_>
* then, compile it ::
 make clean
 make
* and finally copy the .pd_linux to your externals folder ::
 cp *.pd_linux /usr/lib/pd/extra//
 cp *.pd /usr/lib/pd/doc/5.reference
next time you start pd, the library should appear in the help browser.
MAC OSX ( macintel or powerpc )
Binary package
* install Pd-extended or Pd-l2ork
* download OpenCV Framework : [[4]] from http://www.ient.rwth-aachen.de/cms/software/opencv/
 * open it and drop the OpenCV.framework into your /Library/Frameworks/ folder

 * for mac OSX 10.5 download [[5]]

 * for mac OSX 10.6 and superior download [[6]]
* unarchive it and move the *.pd_darwin files to ~/Library/Pd
next time you start pd, the library should appear in the help browser.
Install from sources
* get the _SOURCES_ of the package :
===== pix_opencv =====
pix_opencv is now version 0.2-rc6
Due to the big differences between OpenCV 2.x for which it was developed at first and OpenCV 3.x, we set up 2 separate repositories that could be updated independently :
====== pix_opencv for OpenCV 2.x ======
git clone http://giss.tv/~git/git.cgi/pix_opencv-2.x.git ( tested with OpenCV 2.4.10 )
====== pix_opencv for OpenCV 3.x ======
git clone http://giss.tv/~git/git.cgi/pix_opencv-3.x.git ( tested with OpenCV 3.2.0 )
* note : the following objects are not available for 3.x :
  pix_opencv_motempl.cc
  pix_opencv_knear.cc
  pix_opencv_bgstats.cc
  pix_opencv_pgh_compare.cc
  pix_opencv_of_bm.cc
  pix_opencv_of_hs.cc
  pix_opencv_of_lk.cc
    * if you miss these objects, look into installing pdp_opencv below and use them in your gem environment with :
    * [pdp_opencv] -> [pdp2gem from pidip] -> [pix_texture]
===== pdp_opencv =====
pdp_opencv is now version 0.2-rc7 and is maintained, unlike pix_opencv
====== pdp_opencv for OpenCV 2.x/3.x ======
It is maintained in one single repository :
git clone http://giss.tv/~git/git.cgi/pdp_opencv-3.x.git
note for version 3.x :
* pdp_opencv_bgstats is now replaced by pdp_opencv_bgsegm ( much better )
* pdp_opencv_of_bm, pdp_opencv_of_lk, pdp_opencv_of_hs are replaced by pdp_opencv_of_fb ( much better )
* pdp_pgh_compare is not available, but you can use pdp_opencv_hu_compare instead.
* download OpenCV Framework : [[7]] from http://www.ient.rwth-aachen.de/cms/software/opencv/
* open it and drop the OpenCV.framework into your /Library/Frameworks/ directory
 * get the _SOURCES_ of the pd you are using and of the GEM that you are loading ( it might not work if the version is different )

 * cd into the pix_opencv/pdp_opencv folder :
 cd pix_opencv-2.x
 or
 cd pix_opencv-3.x
 or
 cd pdp_opencv-3.x
* configure the package with the appropriate command for your system :
./configure --with-pd=<path to pd _sources_> --with-gem=<path to gem _sources_>
for example :
./configure --with-pd=/usr/local/pd --with-gem=/usr/local/pd/gem
or
./configure --with-pd=<path to pd _sources_> --with-pdp=<path to pdp _sources_>
* then, compile it ::
 make clean
 make
* and finally copy the .pd_darwin to your externals folder ::
cp *.pd_darwin /Applications/Pd-*.app/Contents/Resources/extra/Gem/ for example
( of course change the path to the pd version you are using ).
next time you start pd, the library should appear in the help browser.
IMPORTANT TIPS & KNOWN BUGS
In order to make the pix_opencv objects work, you always had to set colorspace RGBA, otherwise, You will not see any effect.
FOR DEVELOPPERS
Here you can find some examples of commented code to help you programming with Open CV in pd.
- pdp_opencv_threshold & pix_opencv_threshold**
- pdp_opencv_edge & pix_opencv_edge**
(from pdp_opencv_edge_process_rgb) ::
   // We make here a copy of the PDP packet in image->imageData ...
   // image is a IplImage struct, the default image type in openCV, take a look on the IplImage data structure here
   // http://www.cs.iit.edu/~agam/cs512/lect-notes/opencv-intro/opencv-intro.html
   memcpy( x->image->imageData, data, x->x_size*3 );

   // Convert to grayscale
   cvCvtColor(x->image, x->gray, CV_BGR2GRAY);

   cvSmooth( x->gray, x->edge, CV_BLUR, 3, 3, 0, 0 );
   cvNot( x->gray, x->edge );

   // Run the edge detector on grayscale
   cvCanny(x->gray, x->edge, (float)x->edge_thresh, (float)x->edge_thresh*3, 3);

   cvZero( x->cedge );

   // copy edge points
   cvCopy( x->image, x->cedge, x->edge );

   //memory copy again, now from x->cedge->imageData to the new data pdp packet
   memcpy( newdata, x->cedge->imageData, x->x_size*3 );_threshold**
(from pix_opencv_edge :: processRGBAImage)
   // Here we make a copy of the pixel data from image to orig->imageData
   // orig is a IplImage struct, the default image type in openCV, take a look on the IplImage data structure here
   // http://www.cs.iit.edu/~agam/cs512/lect-notes/opencv-intro/opencv-intro.html
   memcpy( orig->imageData, image.data, image.xsize*image.ysize*4 );

   // Convert to grayscale
   cvCvtColor(orig, gray, CV_BGRA2GRAY);

   cvSmooth( gray, edge, CV_BLUR, 3, 3, 0, 0 );
   cvNot( gray, edge );

   // Run the edge detector on grayscale
   cvCanny(gray, edge, (float)this->edge_thresh, (float)this->edge_thresh*3, 3);

   cvZero( cedge );
   // copy edge points
   cvCopy( orig, cedge, edge );

   //copy back the processed frame to image
   memcpy( image.data, cedge->imageData, image.xsize*image.ysize*4 );
- pdp_opencv_bgsubstract & pdp_opencv_bgsubstract**
- pdp_opencv_distrans & pdp_opencv_distrans**
- pdp_opencv_laplace & pdp_opencv_laplace**
- pdp_opencv_motempl & pdp_opencv_motempl**
- pdp_opencv_morphology & pdp_opencv_morphology**
- pdp_opencv_floodfill & pdp_opencv_floodfill**
- pdp_opencv_haarcascade & pix_opencv_haarcascade**
- pdp_opencv_motempl & pix_opencv_motempl**
- pdp_opencv_contours_boundingrect & pix_opencv_contours_boundingrect**
- pdp_opencv_lk & pdp_opencv_lk**
